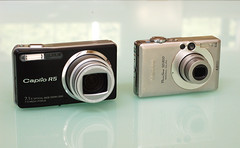
Check your warranty Canon SD200 / Canon SD300 / Canon SD400
Most cameras have a 1 year warranty. If your camera is still under warranty you may want to see if you can get the camera professionally repaired free. Look at the details of your warranty. Most companies have you write a letter stating how the problem occurred (ie: LCD wouldn't turn back on after transferring pictures). Cracked LCD's are harder to explain because the warranty doesn't cover you if you dropped the camera. If you purchased a warranty package at a retail store (such as Circuit City or Best Buy), their plan may cover accidental damage. If you did drop it, and plan on sending the unit to the manufacturer, do not admit to dropping it, lie.
Recognize the problem
Before you begin to tear into your camera, make sure it is a problem that you are comfortable repairing. A lens problem requires a much more invasive repair compared to changing an LCD.
Avoid static damage
The first time I tried to repair a digital camera, I did everything correct, except one thing. I did not take the proper precautions to make sure I wouldn't damage the circuitry of my camera with a static charge. The camera I tried to repair thus needed even more repair than when I started.
Here are a few precautions you can take to avoid damaging your camera with static electricity:
1) Remove the battery from your camera before you open the case
2) Wear anti-static latex gloves, or a wrist strap that grounds you.
3) Try to keep your body at the same electric potential as the camera.
You can do this by touching something metal (non-electrical) on the camera at different points during the procedure. For example, I know most Canon's have a metal frame holding their shape.
Keep track of materials
There is nothing worse than closing up your camera after a successful repair and realizing you don't have enough screws, or just as bad, realizing you have too many screws.
Here are a few tricks that you can follow to make sure you don't lose any screws and so that you remember where every screw was removed from:
1) Do all of your work over a paper plate. This way, if you do drop a screw, the edges of the plate won't let it roll away.
2) As you remove each screw, tape it to the plate or a piece of paper and label where it was removed from (ie: 'top of LCD'; 'housing case left bottom'; 'under LCD top right'; etc.)
3) Even though a magnetized screwdriver would make loosing screws more difficult, one should not be used because it may interfere with the electrical and mechanical parts of the camera
4) If you want you can sketch the camera on a sheet of paper and tape the screw on corresponding area of the sketch.


.jpg)

 Step 6: Now get the new LCD. (information on how to get a new LCD can be found on the repair shop link). Attached it to the string and gently pull it through to help the ribbon go through all the way.



.jpg)