The cheapest LCD I have found online is through The Foto Geeks for $55, however you can actually buy a cheaper whole (working) camera from eBay, and usually accessories are included with it. Note to make sure it is only the LCD which is cracked and not the backlight, in order to get the correct replacement parts.
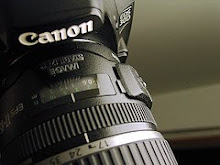
My poor camera with cracked LCD screen:
 Tools required:
small Philips head screwdriver
small flat head screwdriver
First remove the 6 Philips screws on the edges of the metal case, location defined by the arrows in the photo below:
 Remove the front half of the metal case by starting at the camera’s base, at the top there is a metal clip which connects the front and back halves. Removing the front half free form this clip requires a bit of manipulating . The clip is circled in the photo below:
 Once the front half of the metal housing is removed, the back half can be removed extremely easily. You will be presented with the LCD screen, remove the single Philips screw which holds the LCD in place as per the photo below:
 Slide the LCD screen to the left, and this will release the screen from a little clip. Once the screen is free, remove a Philips screen holding the tripod mount is place:
 Turn the camera over, and remove the front screw which holds the tripod mount. You can then remove the tripod mount which will allow the removal of the main LCD ribbon cable. The ribbon cable is disconnected by lifting up the brown tab on the connector:
 Once the main ribbon cable is removed, the backlight’s ribbon cable can then be accessed easier. It is removed by simply pulling the cable away from the socket perpendicular to the PCB:
The LCD can now be removed from the camera. The below photo is the replacement LCD screen:

To connect the replacement LCD and reassemble the camera, perform the above instructions in reverse. It is a good idea to test the replacement LCD before assembling, to make sure everything works fine.
No comments:
Post a Comment