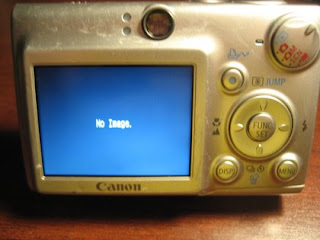
If you have a damaged LCD follow the steps below to repair this problem.
Step 1: Make sure that the LCD is what is the problem and that by fixing this the camera will be like new again. The best way to do this is to take the A/V cable that came with the camera and plug it into the camera and TV (A/V slot on camera found by the USB cable)
 Step 2: Unscrew housing, keeping track of the screws. You should have a total of eight (8) screws. For this camera they made it a little tricky. There are three (3) easy to see screws on the bottom, two (2) on one side, and one (1) on the other. The side with one screw has two more hidden. There is one under the flap you lift to access the USB port, and there is one under that piece you just unscrewed
.JPG) Step 3: Unscrew the LCD/backlight unit and the button pad. There are three screws for this, one on the top left of the LCD unit, one under the backlight ribbon on the top right of the LCD unit (you have to remove this ribbon) and one on the top right of the button pad.
Step 3: Unscrew the LCD/backlight unit and the button pad. There are three screws for this, one on the top left of the LCD unit, one under the backlight ribbon on the top right of the LCD unit (you have to remove this ribbon) and one on the top right of the button pad.


 Step 4: Fold both the LCD/backlight unit and the button pad down to reveal where the ribbon is inserted into the camera's motherboard
Step 5: Undo the ribbon from the broken LCD.
Step 6: Now get the new LCD. (information on how to get a new LCD can be found on the repair shop link). And insert it opposite the way you removed the old LCD (the metal on the ribbon should be down). Make sure it is FULLY inserted (use toothpicks in ribbon holes for aide in this step)
Step 7: Put back the LCD/backlight unit and the button pad (the screw that goes under the backlight ribbon goes through both the LCD/backlight unit and button pad, make sure the LCD/backlight unit screw hole is under the button pad screw hole)

Step 8: Replace the backlight ribbon

Step 9: Remove any fingerprints
 Step 10: Replace the housing. Don't forget to first screw in that hidden screw from before before covering it up.
Step 11: Insert the battery and test to see if the LCD unit works.

Congratulations, you did it!!!!
Didn't work? - If you only see white, this means that there is either a problem with the LCD unit you inserted, or that you failed to insert the ribbon fully. If you see an image, but is dark, then the backlight ribon was not replaced correctly or fully. If the camera doesn't power on, then you may have shorted a circuit, and failed to take the proper precautions as mentoined here.

No comments:
Post a Comment